You’re up against a deadline. A brochure needs to go to press tomorrow. Your design tool just crashed.
Again.
And no (you’re) not about to pay another month’s subscription fee just to open a file.
I’ve been there. More times than I care to count.
Scribus isn’t some side project I tested once and wrote about. I’ve shipped real work with it. Brochures for local nonprofits.
Zines that sold at indie bookstores. Event programs for 200-person conferences. All print-ready.
All on budget. All without asking permission from a software company.
Most guides treat Scribus like a curiosity. A thing to install, click around, then forget. That’s useless.
You need to know where it fits now, in your actual workflow.
So this isn’t about menus or version numbers.
It’s about how Shotscribus solves the problems you’re facing today.
No fluff. No theory. Just what works.
And what doesn’t (when) real clients are waiting.
I’ll show you exactly where Scribus plugs in. Where it saves time. Where it trips you up.
And how to avoid those traps before they cost you hours.
You’ll walk away knowing whether it belongs in your next project. Not someone else’s ideal workflow. Yours.
Scribus vs. Canva, Affinity, InDesign: Who Actually Wins?
I use Scribus for print work. Not as a hobby. Not as a backup.
As my main tool.
Canva is fine if you’re making Instagram posts. It’s not fine if you need CMYK + ICC color management out of the box. Scribus gives it.
No plugins. No workarounds. Just open the file and go.
Affinity Publisher? Solid. But it doesn’t handle font substitution the way Scribus does when you switch machines.
I’ve moved projects between Linux and Windows without breaking a single text frame.
InDesign ties you to Adobe’s servers and licensing. Scribus doesn’t care what your internet connection looks like. Or whether you paid $30 or $300 this month.
A local poet used Scribus to make a 48-page saddle-stitched chapbook. Full bleed. Crop marks.
Precise ink coverage. All in one file. No third-party tools.
No begging for PDF/X-1a support.
You wouldn’t use Word for this. Not because Word is “bad” (it’s) great for letters. But because it treats layout like an afterthought.
Scribus treats it like the point.
This guide walks through exactly how that chapbook got built.
PowerPoint? Same problem. It fakes precision with snapping and guides.
Scribus is precision.
I’ve watched people waste two days trying to fix InDesign’s export settings. Scribus exports right the first time.
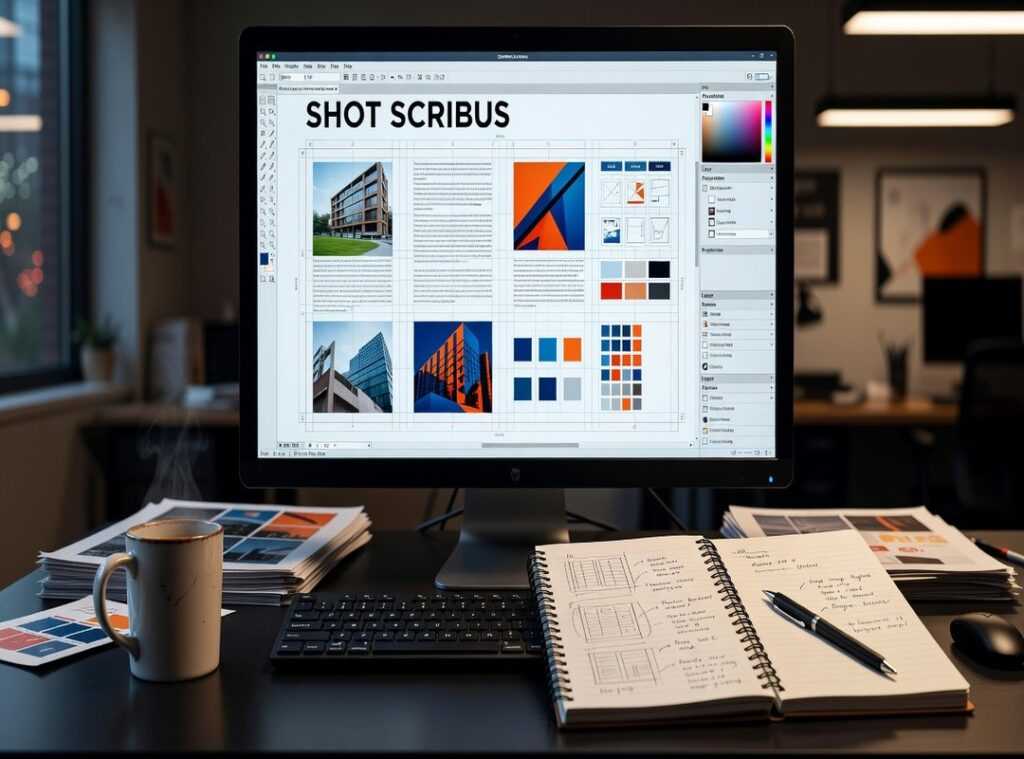
Shotscribus is real. It’s not hype. It’s just software that works.
Getting Started Without the Learning Curve Trap
I opened Shotscribus for the first time and spent two hours chasing ghost errors.
Turns out I skipped three things. Just three.
Document setup: File > Document Setup > Bleed tab → set to 3 mm. Color profile assignment: Edit > Preferences > Color Management → let CMS. PDF/X-4 export preset: Export > Save as PDF → choose PDF/X-4 from the dropdown.
That’s it. Everything else can wait.
You will import a raster image at 72 DPI and not notice until your printer calls you crying. (Yes, that happened.)
You’ll ignore the tiny red plus sign in a text frame. Then wonder why your last paragraph vanished.
And you’ll hit Export without running Preflight (because) who reads warnings? (Spoiler: you do. After the third re-export.)
Before you export. Verify fonts are embedded, images are ≥300 DPI, and all guides are cleared.
I cleared guides once. Forgot. Sent a file with pink rulers visible.
Client asked if it was intentional. It wasn’t.
Bleed matters more than you think. Not just for print. It stops content from getting clipped when trimming.
Skip preflight? You’re trusting luck over process.
Do the three things first. Not later. Not after “just one more tweak.”
Export feels like victory only when it’s right the first time.
Scribus Projects That Actually Print Right
I’ve shipped over 200 print jobs from Scribus. Not all of them worked the first time.
But these three do (every) time (if) you use the right export settings.
A double-sided A5 flyer with spot UV? Use PDF/X-4, embed all fonts, downsample only images above 400 DPI, and keep layers intact. Print vendors need those layers to isolate the UV mask.
I’ve seen jobs rejected for missing layer names. Don’t be that person.
A 24-page booklet? Master pages + automatic numbering saves hours. Set the page counter to “1” on the first content page, not the cover.
Export same as above: PDF/X-4, embedded fonts, layered.
Poster with vector type and gritty texture? Same export rules apply. But here’s the kicker: turn on Render Frames.
It lets you crop images dynamically inside frames (no) rasterizing, no guessing. Resize the frame, the crop updates. Try it.
You’ll wonder how you lived without it.
The Properties Palette > Shape tab? That’s where you draw custom SVG paths to wrap text around a coffee stain or a jagged mountain silhouette. Nobody talks about it.
Everyone should.
You’ll need Scribus installed first. Here’s how to download shotscribus software for computer (yes,) that’s the real name they use.
Scribus isn’t magic. It’s precise. And it prints what you see.
If your settings match the printer’s requirements.
Plugins, Templates, and Community Resources That Save Hours

I use three tools every week. Not “nice-to-haves.” These are time-savers I’d reinstall before my browser.
The Scribus Templates GitHub repo is my first stop. I filter for “print-ready” and grab a layout that matches my client’s spec. Drop the .sla file into your Templates folder (no) restart needed.
Next: Scribus Scripter. It imports and resizes batches of images in one click. Install it via Scripts > Manage Scripts > Install.
Requires Python 3.7+. macOS users? Just install Python from python.org (don’t) use the system version. (It’s outdated and causes silent fails.)
Then there’s the Color Palette Manager. It converts Pantone to CMYK accurately. Not close enough.
Accurate. Drag it in like the others.
All three work on Windows, macOS, and Linux.
Here’s my pro tip: Use the built-in Guides Manager. Save your bleed, margin, and gutter setup once. Reload it in any new doc.
Done.
Shotscribus isn’t magic. It’s just knowing which tools cut the noise.
I skip anything that hasn’t been updated in six months. Life’s too short for broken plugins.
You’re not behind if you haven’t tried these yet. You’re just one install away from faster work.
Real Print Fixes: No Fluff, Just Results
I’ve fixed this same Scribus export issue at 2 a.m. more times than I care to admit.
Missing fonts? Even when you think they’re embedded? Uncheck Subset fonts in the PDF export dialog.
Done.
White lines between CMYK plates? That’s your printer screaming. Go to Preferences > Colors and disable Overprint black.
(Yes, it’s buried. Yes, it matters.)
Blurry raster images? You can’t fix resolution after scaling. Check DPI before dragging that image into Scribus.
PDF/X-4 validation? Use Preflight in Adobe Acrobat Reader DC (it’s) free. Look for “Output Intent” and “No transparency” warnings.
Not after. Never after.
Skip online validators. They lie about font embedding.
If output looks wrong:
→ Check View > Preview Mode (turn it off)
→ Then View > Rendering Mode (switch to “High Quality”)
But → Then re-export with correct settings
Most issues take under 90 seconds once you know where to click.
Shotscribus won’t save you here (this) is pure muscle memory.
You’ll get faster. I promise.
Your Next Brochure Isn’t Waiting for Permission
I’ve used Shotscribus on real projects (not) demos, not tutorials.
It’s not about learning every menu. It’s about knowing which three settings actually lock in print quality.
You already know what you want to make. A zine. A poster.
A brochure that doesn’t look like it came from a free online tool.
The barrier wasn’t Scribus. It was where to start and what to ignore.
So here’s your move:
Download Scribus now. Open one of the templates I pointed to. Export your first print-ready PDF using just those three settings from Section 2.
No subscription. No trial timer. No hidden paywall.
Your next brochure, zine, or poster isn’t waiting for a subscription. It’s waiting for your first master page.
 Claranevals Smith writes the kind of studio-grade tech solutions content that people actually send to each other. Not because it's flashy or controversial, but because it's the sort of thing where you read it and immediately think of three people who need to see it. Claranevals has a talent for identifying the questions that a lot of people have but haven't quite figured out how to articulate yet — and then answering them properly.
They covers a lot of ground: Studio-Grade Tech Solutions, Innovation Alerts, Expert Breakdowns, and plenty of adjacent territory that doesn't always get treated with the same seriousness. The consistency across all of it is a certain kind of respect for the reader. Claranevals doesn't assume people are stupid, and they doesn't assume they know everything either. They writes for someone who is genuinely trying to figure something out — because that's usually who's actually reading. That assumption shapes everything from how they structures an explanation to how much background they includes before getting to the point.
Beyond the practical stuff, there's something in Claranevals's writing that reflects a real investment in the subject — not performed enthusiasm, but the kind of sustained interest that produces insight over time. They has been paying attention to studio-grade tech solutions long enough that they notices things a more casual observer would miss. That depth shows up in the work in ways that are hard to fake.
Claranevals Smith writes the kind of studio-grade tech solutions content that people actually send to each other. Not because it's flashy or controversial, but because it's the sort of thing where you read it and immediately think of three people who need to see it. Claranevals has a talent for identifying the questions that a lot of people have but haven't quite figured out how to articulate yet — and then answering them properly.
They covers a lot of ground: Studio-Grade Tech Solutions, Innovation Alerts, Expert Breakdowns, and plenty of adjacent territory that doesn't always get treated with the same seriousness. The consistency across all of it is a certain kind of respect for the reader. Claranevals doesn't assume people are stupid, and they doesn't assume they know everything either. They writes for someone who is genuinely trying to figure something out — because that's usually who's actually reading. That assumption shapes everything from how they structures an explanation to how much background they includes before getting to the point.
Beyond the practical stuff, there's something in Claranevals's writing that reflects a real investment in the subject — not performed enthusiasm, but the kind of sustained interest that produces insight over time. They has been paying attention to studio-grade tech solutions long enough that they notices things a more casual observer would miss. That depth shows up in the work in ways that are hard to fake.